The post How to Get Your RV to Stop Shaking with the STEADYfast Stabilizing System appeared first on Full Time Canada.
]]>Whether it’s simple movements, the dog jumping off the couch, or even just entering/exiting the fifth wheel shakes. At first, it was a massive annoyance. After a few weeks, however, we must have become used to the constant shaking as we didn’t notice it as much.
Although we became used to the constant shake of the fifth wheel, we were always looking for ways to reduce it. We tried some common things and various products, but nothing really eliminated most of the shake until we tried out the STEADYfast Stabilizing System.
What We Tried Before Installing the STEADYfast Stabilizing System
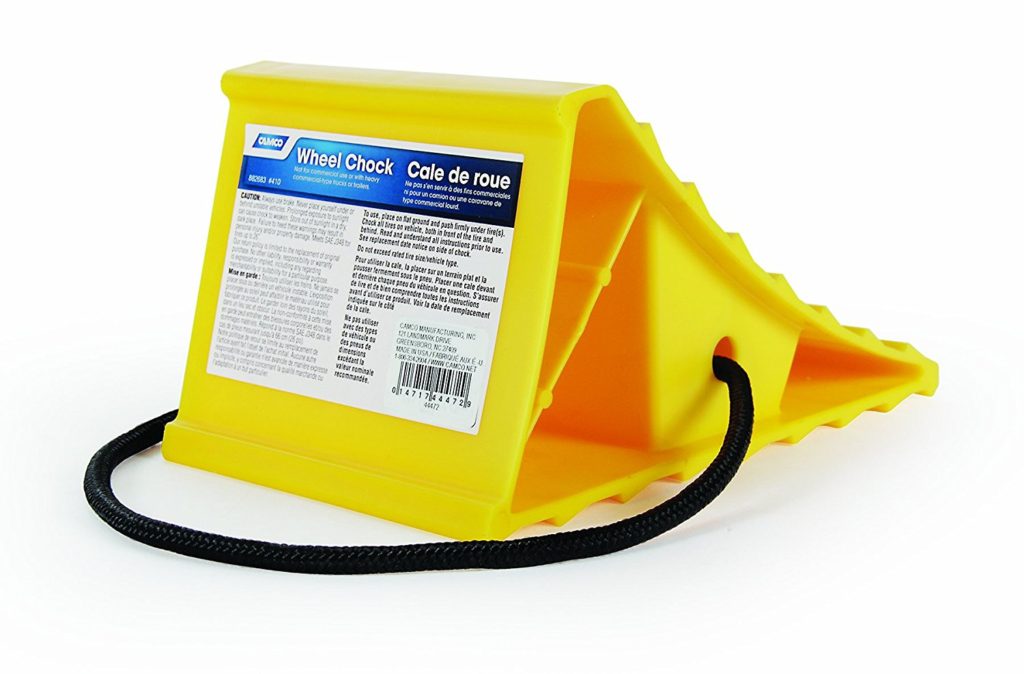
Wheel Chocks
Anytime you stroll through an RV park, you will see that most RVs have wheel chocks in between their tires. These chocks are great for stopping your RV from rolling away from its position after you unhook from your tow vehicle. The chocks, however, are mostly useless in terms of stabilizing your RV. It’s possible that these chocks will reduce some back-to-front movement but nothing tangible.
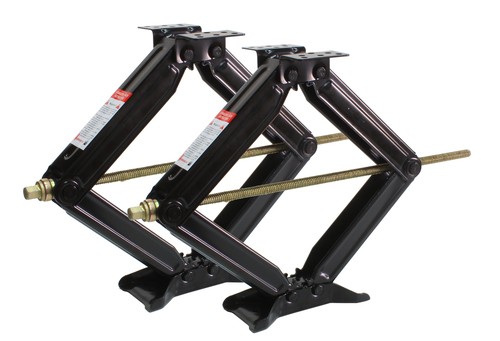
Scissor Jacks
Most trailers and fifth wheels come installed with scissor jacks that are extended once the trailer is parked. These jacks aim to reduce some of the shaking a trailer experiences. While the jacks do help, again, it’s a minor reduction of overall shaking.
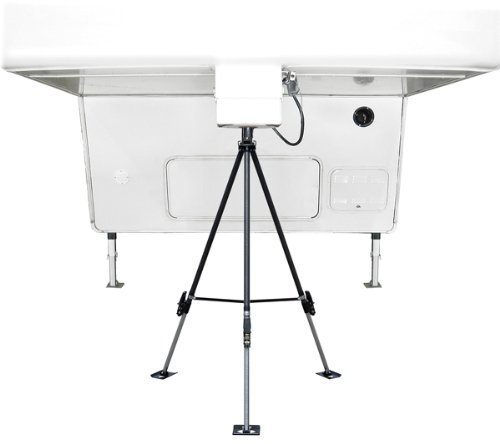
Tripod Stands
When we first purchased our fifth wheel, we immediately bought a tripod stand in hopes that it would eliminate all shake from our fifth wheel. Well, we can safely say that did not happen. While it may have reduced a small amount of shaking the difference was barely noticeable. We even stopped setting up the tripod as we travelled across Canada because it wasn’t worth setting up and tearing down, even though it takes probably two minutes to set up.
Discovering the STEADYfast Stabilizing System
After trying the various methods above and getting frustrated at the fact our fifth wheel was still shaking, we were still on the lookout for something that could help solve our problem. Surely, with so many RV’s out there, there had to be a way to reduce the shake of our fifth wheel.
Probably the best thing to come from Facebook other than adorable cat and dog videos are the incredibly helpful various RVing Facebook groups on the social network. When Kate and I first moved into our fifth wheel, we were so overwhelmed with questions. Thankfully, the RVing groups on Facebook allowed us to find most of the answers we were looking for. The groups also came through when we were looking at how to solve our shaking problem.
One day as I was scrolling through my Facebook feed, I noticed that someone in one of the RVing groups had asked the simple question, “How do I get my RV to stop shaking?” There were plenty of responses but the answers that seemed to be most positive were people talking about the STEADYfast Stabilizing System.
I was intrigued and wondered how I hadn’t yet heard of the STEADYfast Stabilizing System. Immediately, I looked up their website and started to learn all about this supposed magical product that would reduce the shake of our fifth wheel.
What is the STEADYfast Stabilizing System?
The STEADYfast Stabilizing System is a permanently installed brace system that effectively anchors the frame of your fifth wheel or trailer to the ground. This is how it’s described on their website:
“The STEADYfast system anchors the trailer frame to the ground using 3 rigid braces or bars that are attached to high performance self leveling foot plates. The foot plates attach to existing jacks. Conveniently located locking clamps and the rigid design allow your 5th wheel or travel trailer to be stabilized with ease.”
Once the system is installed, STEADYfast claims that customers will see a 90-95% reductions in movement. That’s a pretty substantial percentage. After seeing that impressive figure combined with the amazing reviews that I had read on the various RVing groups, it was a must that we try out the STEADYfast Stabilizing System.
Receiving & Installing the STEADYfast Stabilizing System
A couple weeks after reaching out to STEADYfast our stabilizing system was available for pick up at our local post office here in Tofino. When I went to pick it up, the poor mail person was struggling with handing it over to me. It came in a large box and indeed was very heavy.
Once home, I opened the box to inspect its contents. It’s no wonder the package is so heavy. Inside I saw the various braces which would be mounted to our fifth wheel. I picked one up and immediately remarked to Kate about how solid these were. You could see and feel the quality of the product right away. This was a great first impression.
Next came the installation of the system. This is the part that I was worried about. I’m the furthest thing from a “handyman” and was worried that I wouldn’t be able to install the system. However, the STEADYfast website claims that installation is rather easy and should take no longer than 2-3 hours. I imagined that for myself that it would take much longer than that. It once took me 4 days to put a small BBQ together.
In order to prepare myself for the installation, I watched various Youtube videos from STEADYfast as well as customers who had installed the system. This gave me a better idea of what I was going to be doing during the installation rather than reading the instruction manual that came with the package. I’ve never been good with written instructions but combining them with Youtube videos provided the perfect amount of knowledge I needed to successfully install the system.
Over the course of a couple of days, I spent probably 8-10 hours installing the system. Like I said, I’m not handy and a lot of that time was taken to double check and make sure that I was installing everything properly. If I were to install the system again, it would probably only take 2-3 hours.
Looking back now, most of the installation was pretty straightforward and easy. That being said, there was one challenging/frustrating part for me. There are brackets that have to be installed onto the frame of your trailer. To do so, you have to drill some holes followed by installing the bracket onto the frame with self-threading bolts.
The self-threading bolts are a bit of a challenge. Even in some of the videos I’ve watched, this part of the installation is the most challenging for others. I knew I wasn’t alone but I still had to get the job done. The challenge was actually getting the bolts to thread and push through the drilled hole to successfully mount the brackets. At one point, Kate had to take over because I was getting frustrated with this part of the install. She managed to successfully get one of the bolts into the frame. While she was doing that I found an impact drill in our workshop here at Crystal Cove Beach Resort. This made the job MUCH easier and I highly recommend using one to make your life easier.
Does the STEADYfast Stabilizing System Actually Work?
The simple answer is a resounding YES! I first installed the rear brace and Kate and I immediately noticed how much more stable the fifth wheel was particularly in the rear of the fifth wheel. The next day after installing the front and side braces the shaking movement within the RV reduced even further.
A week after installing the STEADYfast Stabilizing System we had to move to another site. This gave us a good idea of how quick and easy it is to set up each time you move your fifth wheel or trailer. There are locking brackets that quickly turn up and down to engage/disengage the system and allow for the rear and front jacks to extend/retract. That’s basically all you have to do when moving sites.
The one interesting thing we noticed after moving to our next site was that the system didn’t work as well. The site we were at was very unlevel from back to front and meant that we had to extend our front jacks quite a bit. I figured this was the reason for the system not working as well, so I emailed STEADYfast.
Anytime you email STEADYfast you’re going to get a rather quick response from Owner/Inventor Paul Hanscom. I had asked Paul about whether or not being on an unlevel site would affect the performance of the system. He quickly responded to say…
“Typically concrete, asphalt and hard ground are relatively easy to get the movement reduction, especially when they are level. Gravel, sand, and grass it are very difficult to set up and get the same movement reduction, but there are things you can do to get the best possible. Sites that aren’t level are more difficult to set up on, but you should be able to get similar performance.”
The site we were on was very soft gravel and incredibly unlevel, so based on Paul’s response it made sense that we weren’t seeing the optimal performance from the system. Nonetheless, it still reduced the shaking of our fifth wheel a considerable amount. Some of the things that can be done when using the STEADYfast stabilizing system on soft ground include using various blocking techniques that are described in the instruction manual.
Overall, we’ve been very happy with the STEADYfast stabilizing system. Not only has the system helped to reduce the movement of our fifth wheel, but the customer service we experienced when we had questions was top notch.
If you want to take the shake out of your trailer or fifth wheel, we highly recommend you give the STEADYfast Stabilizing System a try.
Disclaimer – We received the STEADTfast Stabilizing System in exchange for this post. All opinions in this post are 100% truthful in regards to how we feel about the product.
The post How to Get Your RV to Stop Shaking with the STEADYfast Stabilizing System appeared first on Full Time Canada.
]]>The post Staying Connected on the Road with WiFiRanger appeared first on Full Time Canada.
]]>When we were first planning to full-time RV, finding a way to constantly stay connected was important to us. The main reason being that we were going to be starting this site and we wanted to be sure that we’d always have easy access to post & update the site. Going a weekend without internet is no big deal to us but this was our lives and we had to make sure we stayed connected.
Our First Campground Internet Experience
While we workamped at Jellystone PEI from May to September of last year we were fortunate to have the campground hosts run us a line to our RV that gave us high-speed internet. Our luck changed in a big way and the reality of campground WiFi hit us when we hit the road for our cross-country journey in September.
Crossing Canada with Poor WiFi Along The Way
For 36 days, we travelled from one end of Canada to the other and along the way, there was a constant theme at all the parks we stayed at – the internet was awful. While we were travelling around and doing a lot of touristy things, we still wanted to keep our site up-to-date and timely.
Most parks that we stayed at said that they had WiFi, gave us the codes, and some even gave us sites near the transmitters or repeaters but still – terrible internet. We didn’t have one park where the internet was good enough until we reached Winnipeg. From there til we hit the Pacific Ocean, the internet remained awful.
This experience made us realize how incredibly fortunate we were for that direct internet connection in PEI. It also meant we had to figure out a permanent solution if the internet didn’t get any better for our long stay in Tofino.
Tofino may be one of the most gorgeous locations that we’ve seen but the internet at our park and throughout the entire town is painful. It’s supposed to be getting better with some big updates being done throughout the town. When we first arrived we were definitely a bit concerned about how we’d be able to get all of our online work done. This is when we kicked our search for a permanent solution into overdrive.
How Can You Stay Connected On The Road?
While staying connected on the road can be a tough task for any RVer, it’s exceptionally tough for Canadian RVers as we have fewer options than our American friends. If you’re a Canadian RVer, here are the ways you can stay connected while on the road.
Tethering to your smartphone
When we were travelling across the country and had issues using campground WiFi we often tethered to our phone to do some basic tasks. Generally, this is a terrible option for Canadians because our data packages with all telecommunication companies stink. We have a 2.5gb plan with our phone that costs $105 a month. No doubt Americans are laughing at us right now. This is what most Canadians have to deal with – high monthly bills in exchange for a small amount of data. Because so much of Canada is remote our cell signal is often terrible, too. Here in Tofino, we rarely get LTE service.
You can purchase cell phone boosters to pump up the strength of your phones reception but this still doesn’t really work for Canadians. Because most of our data plans are crummy, expensive, and don’t have great signals in campgrounds it means cell boosters are almost useless. In the U.S. this is an option a lot of RVers go with. Data plans in the U.S. are a lot cheaper and there are options to get unlimited data plans which make us extremely envious. Cellular signals are also generally a lot stronger in the U.S. than Canada.
Mobile Internet/MiFi
Mobile internet aka MiFi options have been around for a while, yet again, aren’t a great option Canadians. While Americans have been enjoying mobile internet for awhile, in Canada it’s still expensive. On average, it would cost $100 for a 20gb monthly plan. Even though there are only two of us, 20gb wouldn’t go a long way with all of the online work we do. Plus, you still have to rely on the unreliable cellular strength which provides the MiFi devices with a signal.
Public WiFi
It’s awesome how many places offer free public WiFi nowadays. From cafes to libraries, there are unlimited places you can go to get connected. The downside is while the WiFi may be free, you likely have to purchase something in order to get connected to the internet. If you’re at a library, you probably have to have a library card. Not to mention, every time you want to use the internet you likely don’t want to leave the comfort of your home. Sometimes (most times) it’s nice to be able to hang around home in your pj’s while taking care of business, right?
WiFi Booster
After hours of research, we discovered that for Canadians, the best option for staying connected while on the road was a WiFi booster. Basically, a WiFi booster takes WiFi signals within a certain range and boosts the strength of those signals for your devices.
There are a few options for WiFi boosters out there, but the one that always caught our eyes was from WiFiRanger. After discovering and researching WiFiRanger, it seemed like this was our key to staying connected.
What Is WiFiRanger?
WiFiRanger is an Idaho-based company that was born when owner/inventor Kelly Hogan became frustrated when trying to stay connected while RVing. Since 2010, WiFiRanger has been selling WiFi boosters to help keep those who enjoy RVing stay connected.
Currently, WiFiRanger features four different products that can help you stay connected while on the road – Sky2 Pack, SkyPro Pack, EliteAC Pack & the EliteAC Pack FM. You can check out full details on each of the units here. In the end, we decided to go with the WiFiRanger EliteAC Pack FM.
What is the WiFiRanger EliteAC Pack FM?
When we were deciding to get a WiFiRanger product, we were set on getting either the EliteAC Pack of the EliteAC Pack FM. Both units feature the ability to boost WiFi signals from as much as 2 miles away. This means that if you’re in a park where the only WiFi being broadcasted is at the office, you should be able to get a quality signal where otherwise you probably would not. It also means that if you’re boondocking, you can pick up some free WiFi signals depending on where you are.
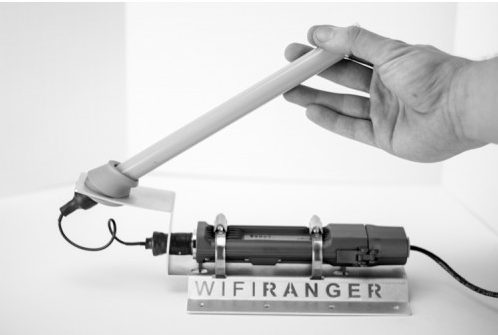
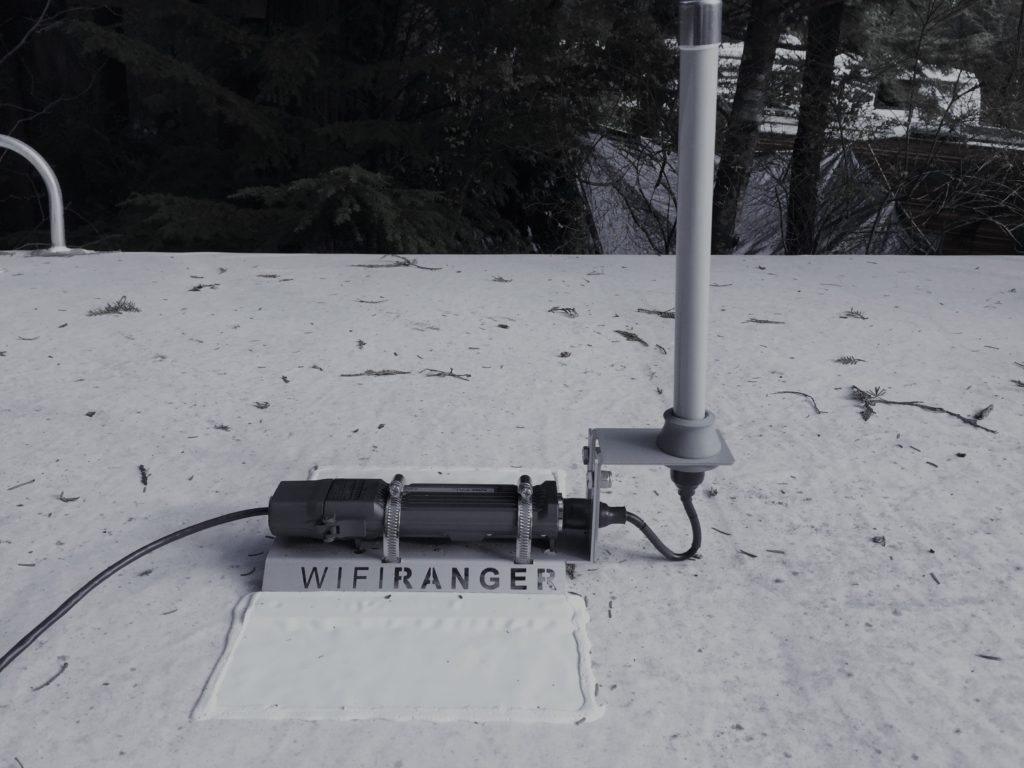
Both the WiFiRanger EliteAC options are essentially the same product with the only difference being how the product is installed. The WiFiRanger EliteAC unit is installed onto a pole, ladder, or batwing antenna whereas the EliteAC Pack FM is mounted on your roof with screws/dicor.
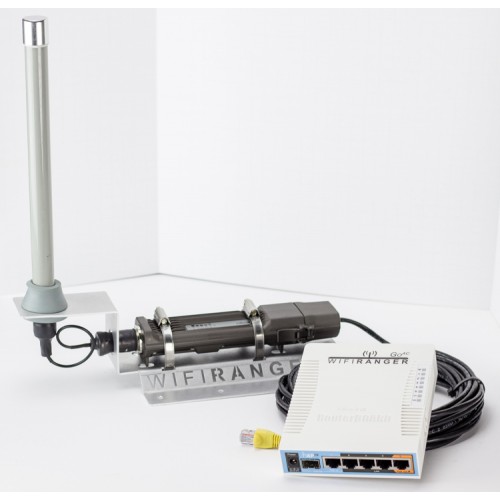
With the WiFiRanger EliteAC Pack FM, you also get the GoAC Router which connects to the outdoor mounted unit through 30 feet of provided cable. The GoAC Router creates your own secure network within your RV which all your devices will connect to. The GoAC Router also has some great features built into it like Auto Connect, Failover (searches for signals after going offline), Cellular Tethering, Data Usage Tracking, Data Usage Restrictions, & a lot more.
With our roof mounted unit, it was a concern of ours that the antenna might be an issue in low-clearance areas or with tree branches, etc. Thankfully, this isn’t a concern with the WiFiRanger EliteAC Pack FM. The unit comes with flex-guard technology which will flex the antenna considerably if any pressure is put on it.
Installing the WiFiRanger EliteAC Pack FM
The one thing that sort of scared us about getting a WiFiRanger unit was the installation but after reading about it and watching some videos, we were confident we could do it. When the WiFiRanger EliteAC Pack FM showed up at our RV, we unboxed it and were happy to see that there weren’t a tremendous amount of pieces included that would have to be installed. We were also happy because our unit came with two Werther’s Original candies which were quite a delight.
Step 1 – Mounting The Unit. WiFi Ranger recommends a couple of different ways to install the unit. You can fasten it to your roof with screws and/or dicor. I’m always hesitant about putting holes in our roof so we went with a different option. We used dicor and then taped over the frame of the unit with Eternabond Tape. This combination should easily keep the unit atop our roof without any issues.
Step 2 – Feeding Cable Into The RV. With the WiFiRanger EliteAC Pack FM you get 30 feet of cable which runs from the roof top unit into your RV where it connects with the GoAC router. The two options here were to drill a hole through the roof and feed the cable through that way. The other option was to feed the cable through a slide out. Can you guess which one we went with? Yeah – we weren’t drilling a hole, so we fed the cable through our back slide out room where the GoAC router and our main desktop computer are stationed.
Step 3 – Connect to GoAC Router. Connecting the 30 feet of cable to the GoAC router is a piece of cake as you can imagine. We had a lot of leftover cable which we bundled together with Velcro ties. We also secured the cable to our wall with nifty wall-mounted cable clips.
Step 4 – Setting Up the GoAC Router. With the unit connected to the GoAC router, it was time to power on and get connected. After starting up the GoAC router, it will automatically search for a WiFi connection. As mentioned above, the GoAC Router has a feature rich control panel with a lot of various customizations that you can make to your connection. I watched a handful of the very informative WiFiRanger Support/Tutorial videos on their website which really helped make sense of how to set up the GoAC Router.
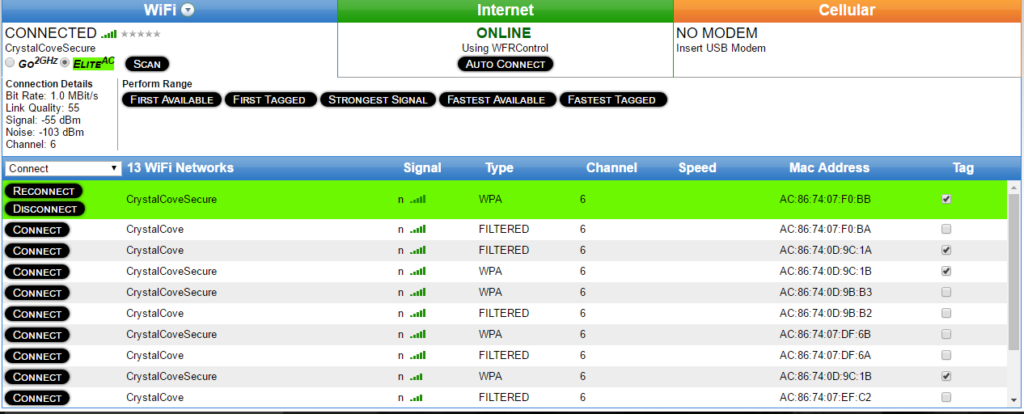
When you first open the control panel you will see all the various WiFi connections available to connect to. Along with the names of the connections, you will see the strength of the signal & the encryption type.
Once you have picked a signal that you want to connect to, you hit Connect and wait for the unit to connect which usually takes 10-15 seconds. After that, you should have a boosted WiFi signal allowing you to enjoy better quality internet than what you would have had without the WiFiRanger EliteAC Pack FM.
Altogether, from the beginning of the installation process to getting connected to the internet, the entire process took less than half an hour.
Our Experience with the WiFiRanger EliteAC Pack FM
Currently, we’re staying at Crystal Cove Beach Resort in Tofino, a beautiful park right on the beach but unfortunately, the WiFi here is unreliable like it is in much of Tofino. While upgrades are on the way, we knew we would need help getting online and staying online. The issue at this park is the WiFi is provided through one main transmitter which then produces signals to various repeaters throughout the park, therefore the quality of the signals being produced for guests aren’t very good. This is pretty common for most RV parks. There are also a lot of beautiful but large trees throughout the park which likely causes a degree of interference. While we haven’t had the opportunity to try out the WiFiRanger EliteAC Pack FM outside of our current park, we’ve been pleased with the results.
Here’s a list of Pros/Cons of our experience with the WiFiRanger EliteAC Pack FM so far.
Pro – Many Connections To Chose From. When we first connected the unit, we were blown away with how many connections were available. In all, there were over 20 connections ranging from good to bad signals. We were impressed to see that the unit picked up a signal from another resort which isn’t too far away. There are, however, a tonne of large trees in between where we are and where that resort is which means it’s pretty impressive that our unit picked up that signal.
Pro – User-Friendly Control Panel. Setting up and configuring the control panel may seem like a scary task for some but it’s really easy. The user manual and tutorial videos are a great reference for configuring the control panel but you can get online without any configurations almost instantly after powering on the unit.
Pro – Strength of the GoAC Internal Network. With the GoAC router, you connect your devices to your own personal WiFi connection that is set up within the control panel. Some concerns we had were that with our router placed at the rear of our RV that the signal wouldn’t be strong enough to reach the front of our RV or even outside of our RV. We’re happy to say that router provides a strong signal that allows us to always stay online.
Pro – Customer Service. On a couple of occasions, we have contacted customer support through their online ticket system with some basic questions. Within a day, the support team got back to us with a detailed explanation helping to inform us or helping to solve our issues. WiFiRanger is a small team that is definitely there to help when you need it.
Pro – The Boosted Signal. This is the big one. As previously mentioned, we had difficulty staying online with a quality signal at our current park. After hooking up the WiFiRanger EliteAC Pack FM we were able to more consistently stay online with a much stronger signal. Before installing the unit we had difficulties uploading images for our blog, watching videos on Youtube, or even loading basic web pages. Now, the boosted signal gives us a sense of normalcy with our internet connection and has allowed us to be less frustrated with dropping signals and poor quality. The speed test we did showed almost an increase of almost double the signal strength we normally have.

A speed test we did once we connected the WiFiRanger EliteAC Pack FM which more than doubled our signal strength.
Con – It Won’t Always Help You. This is at no fault to the unit itself and more so the outside variables that dictate whether you’ll have a good connection or not. Basically, you need to have realistic expectations.
The one common issue that you can run into is that you’ll connect to what looks like a strong signal but that signal is degraded by a lot of people using that signal. If you’re in a large park where there’s only one transmitter, you may still have difficulties getting a good signal.
Some of the other variables that could degrade your overall signal include clearness of line of sight, wireless interference & weather. We’ve had instances where the park WiFi was degraded for a variety of issues where the WiFiRanger EliteAC Pack FM cannot help.
Overall, we couldn’t be happier with how the WiFiRanger EliteAC Pack FM has helped keep us connected. With our blog to update and our upcoming online business launch, a strong and consistent signal is very important to us and we’ve been thrilled that WiFiRanger has been able to provide that for us.
Tell us – How do you stay connected while on the road?
Want to stay connected while on the road? Check out the full lineup from WiFiRanger that can keep you connected while RVing around the continent.
Receive 5% off of your WiFiRanger purchase by using our promo code: WFRFTC
Disclaimer – We received the WiFiRanger EliteAC Pack FM in exchange for this post. All opinions in this post are 100% truthful in regards to how we feel about the product.
Some photos courtesy of www.wifiranger.com
The post Staying Connected on the Road with WiFiRanger appeared first on Full Time Canada.
]]>The post The Truth About Living In An RV: 20 Reasons Why It’s Awesome appeared first on Full Time Canada.
]]>Nothing is perfect but that doesn’t mean you can’t find something that’s pretty close to perfect, right? That’s what we believe we’ve found by living in an RV. I just recently returned from house sitting at my parent’s place in Ontario for a couple of weeks. Throughout the entirety of my time there, even though I loved seeing my family & friends, I desperately wanted to return to my simple life that Kate and I have made for ourselves while living in our RV.
There are so many wonderful things about living in an RV compared to living in a sticks and bricks home. Below are 20 reasons why we think living in an RV is awesome.
1- Less Cleaning
How long does it take you to fully clean your house every week? 2, 3, 4 hours or maybe even more? No one likes spending their precious time cleaning which is one of the reasons why living in an RV is awesome. Because we have considerably less space, naturally it just takes less time to clean it. We spend probably an hour a week doing a really good clean of our RV. That’s it. One hour. That means we have more time to do fun and adventurous things.
2- You’re Always Close to Nature
One of the reasons we first decided to full-time RV was to be closer to nature. When you’re living in an RV you’re usually close to nature as most RV parks are hidden in the woods and near great outdoor spaces. In PEI, we spent our summer at a quiet park with access to the Confederation Trail and only minutes from beautiful beaches. Here in Tofino, we’re living in an actual rain forest which seems surreal when you grow up in Southern Ontario.
While we haven’t boondocked yet, many RVers choose that route. Boondocking is basically camping off the grid by using solar panels/generators to power your basic needs. Many RVers will boondock in remote places for weeks on end where it’s just them surrounded in nature. Sounds pretty awesome, right?
3- Small Space = More Time Outside
One of the questions we often get asked is, “how can you live in such a small space?” It’s a fair question that we were slightly concerned about before living in an RV. Since we’ve now been full-time RVing for almost 10 months we can happily say that the small space is a blessing in many ways. The one main reason is that it forces us outside more which means we’re more active. Rather than spending hours binge-watching various TV shows we now get outside more often or socialize more than we did prior to living in an RV.
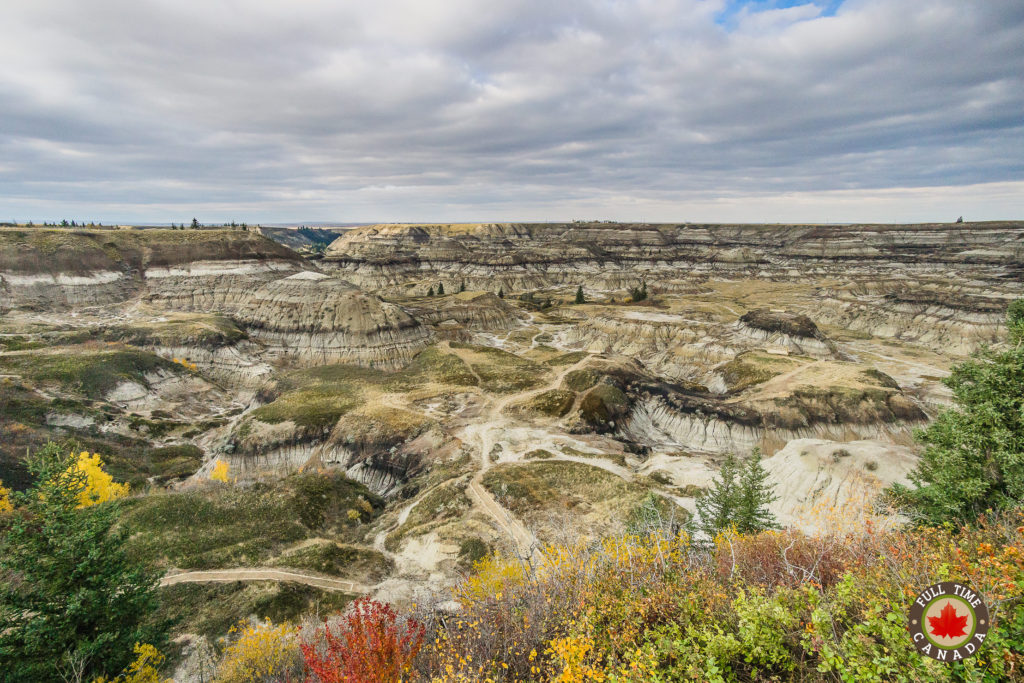
Horseshoe Canyon near Drumeheller, Alberta
4- We Don’t Have a TV
You’re probably thinking, “how can not having a TV be awesome?” Our RV is a 2008 and has a spot for an old tube TV. Instead of sticking a TV in that spot we made it into a little décor shelf. Since living in an RV, we’ve learned that TV is a crutch and a drug for most people including ourselves. When you have a TV, it’s so easy to turn it on, turn your brain off and watch endless hours of TV. When I was at my parents over the last couple of weeks I watched so much TV. I watched both seasons of Narcos in 5 days. That’s horrible. That’s almost 20 hours of TV that I watched in 5 days and that doesn’t include the various hockey games or movies I watched.
Throughout the course of a week, Kate and I will normally watch one or two movies or a few episodes of a TV show on my computer. Altogether, we spend maybe 10 hours a week watching movies or TV. This means we’re spending more time being productive, working on various projects, spending time outside, or socializing. Kate wrote more about living without TV or phone here.
5- If You Don’t Like Where You Live…Move
Living in a neighbourhood is fine and dandy until that one crazy neighbour moves in next door. That neighbour who parks their car on the lawn, cranks music at all hours of the night, and has sketchy people always visiting; leaving you wanting to move just to avoid the madness altogether.
The great thing about RVing is whether you have a level 10 nutcase neighbour or you just don’t like your RV park, you can move. You can pack up the RV in less than an hour and be on to a new location wherever you desire within the day. When was the last time you sold your home and moved out the same day?
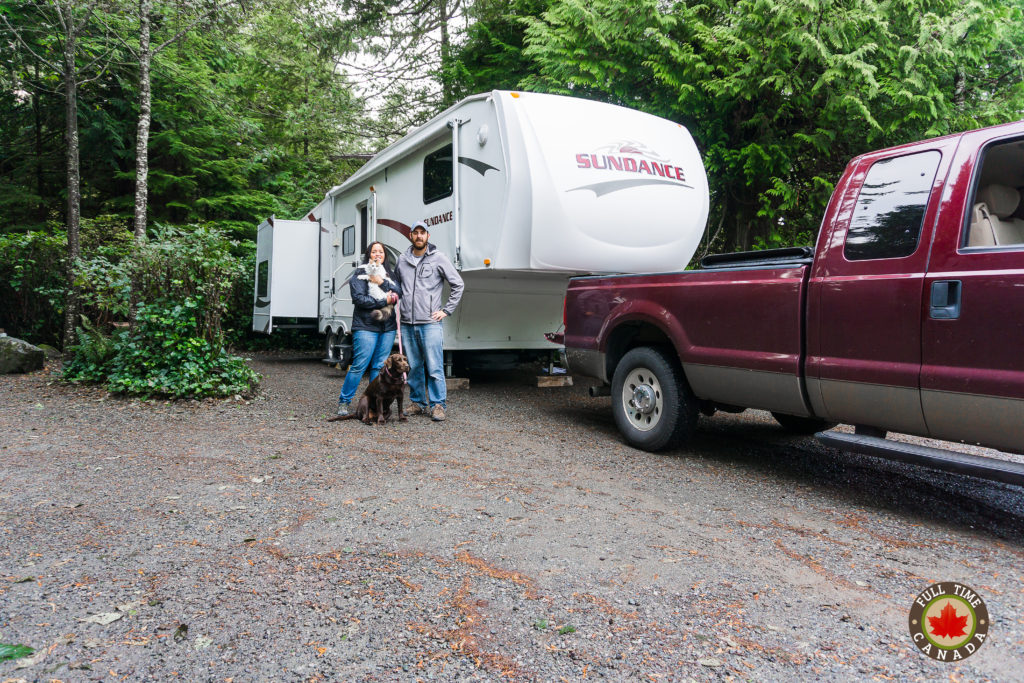
Our new home at Crystal Cove Beach Resort in Tofino.
6- You’re Always Seeing New Places
We started full-time RVing with the goal of seeing and experiencing more places across Canada and North America. If we lived the normal 9 to 5 lifestyle, we’d likely never get to see many of the places that we saw in the last year and will see in the years ahead. Prior to last year, neither Kate nor I had been west of Ontario. Now, we’ve been in every province (not the territories, though) in Canada and seen so many wonderful places in less than a year. We can’t wait to see which places we’ll RV to over the next handful of years. We’re thinking we may RV through the U.S. next winter which will allow us to see many beautiful spots that we’ve never seen before.
7- You Get to Spend More Time Visiting New Places
When you’re working the 9 to 5 lifestyle you likely get between 2-4 weeks of vacation per year. When you take a vacation you’re likely only going to spend only a week in that location before heading home. Many times, you wish you could have had more time visiting that certain special place. When you full-time RV, you can spend as much time anywhere you want. Love visiting the Rockies? Spend weeks exploring Jasper, Banff, and more. The sky is the limit and you can really immerse yourself in a location as much or as little as you want.
8- Your Home is Always With You
When you fly around and travel to various locations don’t you wish that you could sleep in your own bed? Or maybe you wish you could have access to your entire wardrobe rather than what you could shove into a suitcase? When we travelled across Canada this past fall, we learned how awesome it was to always have your home with you. Sleeping in your own bed every night is wonderful. Being able to cook food in your own kitchen is splendid. Basically, having access to your entire home when you travel is fantastic.
9- Less Maintenance
One thing we don’t like about living in an RV is the maintenance that goes along with it. The thing is, owning an actual home requires a lot of maintenance, too. Often that maintenance can cost big dollars. While living in an RV does require its fair share of maintenance, compared to living in a home, the overall amount of time and money spend on maintenance is considerably less.
10- We’ve Become “Handy”
I’m not very handy when it comes to fixing things but living in an RV forces you to learn. Whether it’s learning how to torque the wheels or learning how to seal up the RV so it doesn’t leak, there’s a lot to learn with an RV to keep it in tip-top condition. We’re still aren’t even close to knowing everything about how to fix things in our RV, but we’re getting there. In a few more years, hopefully, we’ll be experts.
11- No Grass to Cut or Snow to Shovel
I actually don’t mind cutting grass. I find it kind of relaxing for some reason but I HATE shovelling snow. Aside from the time a surprise snow storm found us in Jasper, we haven’t had to worry about shovelling snow. Last year, while living in New Brunswick we got hammered with many snow storms, bringing many feet of snow that had to be shovelled from our large driveway. Needless to say, neither of us miss shovelling snow. While I didn’t mind cutting grass, the time spent cutting grass now goes towards doing other fun outdoor activities.
The staff at Jasper Gates Rv Resort, Hotel and Campground are fantastic. They plowed to get us out, used a tractor to dig up the gravel, and then gave us further advice on our driving route. Jessica, Deb, Trevor and especially Ed you were awesome! We made it safe and sound, problem free to Kamloops to see the Jays win!! Happy Thanksgiving!
Posted by Kate McCallum on Sunday, October 9, 2016
12- We Can Have a Campfire Anytime We Want
We don’t have many campfires but we do love the fact that we can have a campfire anytime that we want to. On Christmas Eve, the weather was beautiful here in Tofino, so we sat outside around the fire with a glass of Christmas cheer.
13- Power Outages Aren’t A Big Deal
Unless you have a generator, when you’re living in a home and the power goes out, you sit and wait for it to come back on. If that happens in the middle of winter it could mean you’re without heat which isn’t fun at all. Thankfully, when living in an RV you always have heat thanks to the heat provided by propane. Our RV also continues to have lighting and some other electric functions if the powers out thanks to power provided by our onboard battery.
14- Cheaper Than A Home/Rent
When I was home, which is just north of Toronto, everyone was talking about the prices of homes. Most detached homes start around $600,000 nowadays. That’s insane. Our RV cost us less than $25,000. Yes, unlike a home which is a form of equity, RV’s depreciate in value. Still, there’s a lot of freedom and comfort that comes with not having a $600,000+ mortgage.
We’ve also been workamping during our longer stays in PEI and Tofino. In exchange for roughly 20 hours of work per week, we get our campsite which helps save a pile of cash that we can spend on other things like burritos.
15- No Utility Bills
A cell phone bill and our insurance – that’s our only monthly bills that we pay. We don’t have a hydro, water, gas, tv, or internet bill when living in an RV. Yet, we essentially have all of those services which are provided by the various parks that we stay at. Again, big money saved.
16- Frequently Meeting Like-Minded People
When you look around your office or at the neighbours in your neighbourhood, how many of those people would you say are similar to you? Probably not too many. Another thing we love about living and travelling around in our RV is the ability to meet like-minded people who love to travel and experience new things. It’s great to sit around with these types of people and swap travel stories over a drink or a pile of food.
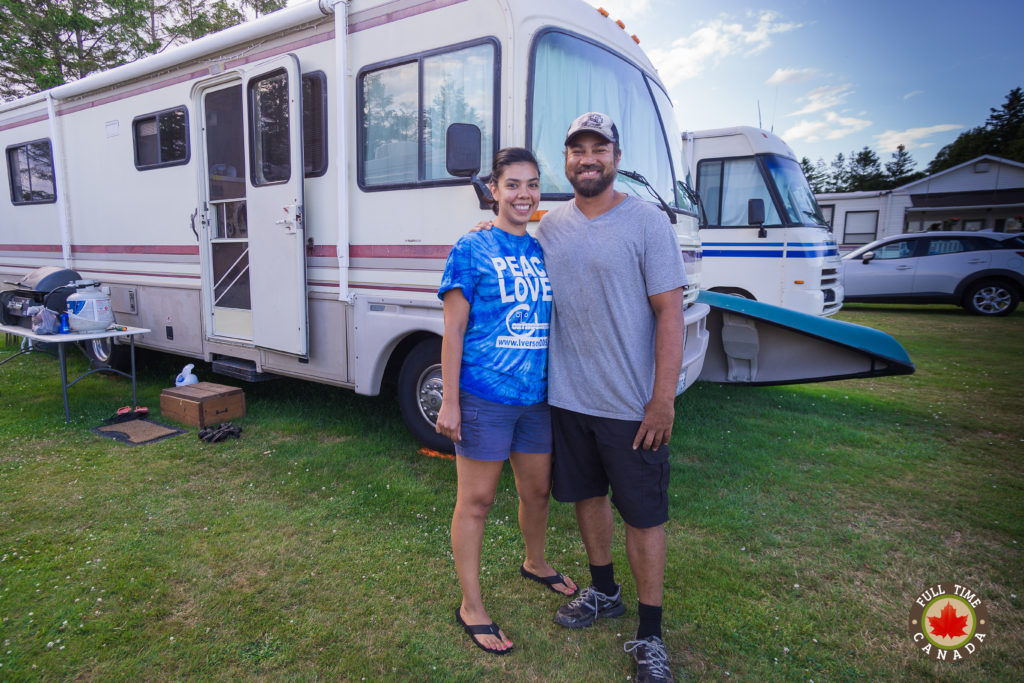
Eric & Rosie are just a couple of the amazing campers we met at Jellystone PEI.
17- Less Food Waste
The last time you cleaned out your fridge and kitchen cupboards, how much food did you throw away? It’s amazing how much food we used to buy, stuff into the fridge or cupboards only to forget about it and discover it months or even years later. Living in an RV allows you to cut down on food waste in a big way. Our fridge is tiny and only capable of storing a small amount of food but this means that we only purchase what we’re actually going to eat. The same goes for our cupboard space. Aside from the time Kate bought 10 cans of spaghetti sauce for $10, we’re pretty diligent about our cupboard space and only stock it with food items that will get used within a week or two.
18- We’ve Become Minimalists
Minimalism is something I wish we had discovered years ago. It makes so much sense and opens your eyes to how much useless crap we buy and then hold onto for years. Aside from being a comfortable place to sleep and eat, a house in a lot of ways is a glorified storage unit for stuff that rarely, if ever, gets used. Because we live in a space that’s 200 sq.ft. we can’t have a bunch of junk in our RV. When we downsized to live in an RV, we sold almost all of our possessions including my valuable record collection. Have I missed that record collection? Nope, not really. Minimalism is a great way to learn to value your experiences over your belongings. Plus, you’ll have more money for those wonderful experiences because you won’t be spending money on stuff just to fill your home. I definitely recommend you read, listen, watch and learn from the Minimalists.
19- We Spend More Time With Bella….and Paris.
When we were working the 9 to 5 lifestyle, we were usually away from the house for 10 hours of the day. This meant that we were away from Bella and Paris for 10 hours of the day. While Paris (our cat) probably prefers us being away for long periods of time, we couldn’t stand being away from Bella for 10 hours every day. While she had frequent visitors who would take her out during the day, we wanted to be with her more frequently. Now, because we live in an RV we can. There is rarely a time where Bella is alone for anything more than a couple of hours out of a day. This means she gets more frequent outdoors time which will hopefully allow her to live a longer life.
20- Everyone Thinks We’re Living The Dream
A lot of people don’t think it’s possible to drop the 9 to 5 lifestyle to live and travel in an RV like we are. When we tell strangers what we do they always have questions full of scepticism. Once we explain our lifestyle and how we do it, everyone thinks that we’re living the dream. Being able to work less and travel more truly was our dream and now we’ve been doing it for almost a year and hopefully many more to come.
Living in an RV has changed our lives considerably. With this lifestyle, there are less financial pressures, less overall costs, and more freedom to do what we want and when we want to do it. In the 10 months we’ve been living this wonderful lifestyle we can say that we’ve never been happier to be living this fulfilling lifestyle.
Do you live in an RV? What do you love about living in an RV?
The post The Truth About Living In An RV: 20 Reasons Why It’s Awesome appeared first on Full Time Canada.
]]>The post Why You Should Choose Coach-Net For RV Roadside Assistance appeared first on Full Time Canada.
]]>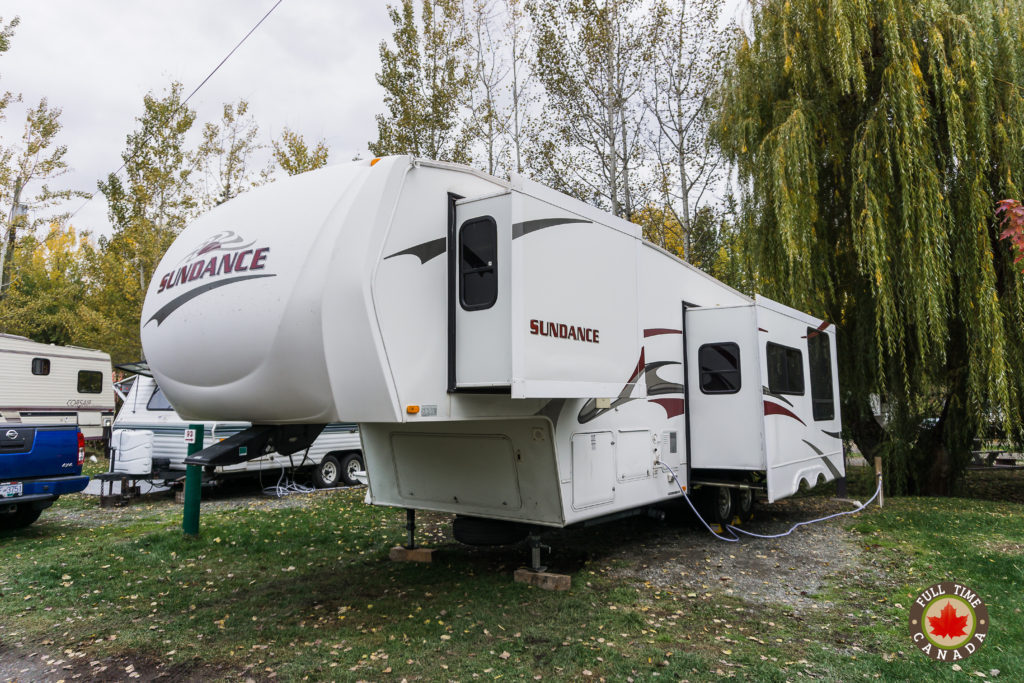
Having a great RV roadside assistance plan will keep you on the road, helping you to arrive at your destination.
Do You Need An RV Roadside Assistance Plan?
Most RV owners should have an RV roadside assistance plan. The people I know without an RV roadside assistance plan are mechanically inclined with great handyman skills. While I know my way around a computer, I have no clue on how to fix things when they break. Even if you are a skilled handyman and know your RV in and out, you may not have all the tools needed to fix an issue when it arises and you’re in the middle of nowhere.
For us, getting an RV roadside assistance plan was all about peace of mind. We knew that if we had a tire blowout in Northern Ontario or if our truck began overheating after climbing the Coquihalla Summit we’d have help. Nothing is worse than being broke down and being stranded. That’s why an RV assistance plan made sense to us. When we departed PEI for Tofino, we hadn’t driven the RV yet aside from a short test drive. We needed to know that everything would be OK if something unfortunate happened on the road.
In doing my research about RV roadside assistance plans, I read on a lot of forums about RVers who purchased a plan only after they had already had an issue. Many of these RVers had tire blowouts, or ran out of gas in the middle of the night and had no one to help. You can be smart and travel wisely limiting the chances of something unfortunate happening, but no matter how prepared you are something will go wrong at some point. In the end, it’s better to be overprepared and protected against unlucky situations. An RV roadside plan is the perfect way to protect yourself.
How We Chose An RV Roadside Assistance Plan
Like most things regarding our RV, I spent hours researching the handful of companies that provide RV roadside assistance plans. At first, deciding on an RV assistance plan was tough. A lot of the companies offer similar services at varying prices. As I began narrowing down my list of potential companies and plans I was interested in, I began looking for further advice.
The best advice you can get on RV products and services is from other RVers. Because we’re full-time RVers, I wanted the insight of other full-time RVers. There are many great resources to gather information on the internet regarding RVing information. I’ve found that the various RVing forums and Facebook groups are the most helpful.
When I asked these various groups about which RV roadside assistance plan they would recommend, the one company that kept coming back to me was Coach-Net. Early in my research, I had found Coach-Net but it wasn’t until reading about what other RVers had to say about Coach-Net that I decided that they were the best option. While typical streams of advertising help to sell products and services, when it comes to our RV, nothing helps me decide on a purchase more than word of mouth. Many fellow RVers had recommended Coach-Net over the “other guys”. In a lot of cases, this was because these RVers had a terrible experience with “the other guys” that left them stranded. After switching to Coach-Net these RVers saw the difference in the customer service provided by Coach-Net.
Knowing that Coach-Net was the preferred RV roadside assistance plan for many RVers was comforting but I still had to do some final research to see if they were right for us.
Why We Chose Coach-Net
Armed with the recommendations of many RVers, I looked further into Coach-Net’s plans and services to see if they would be a fit for us. The first thing I had to check was to see if they offered their services in Canada. There’s nothing worse than getting all excited about a product or service only to find out that you can not get it in Canada. Thankfully, Coach-Net is available in Canada. However, Coach-Net does not offer their RV Protect service in Canada but that wasn’t the plan we were interested in.
After completing my research, we decided that Coach-Net was going to be the plan for us. Here’s why…
- Coach-Net specializes in providing RV roadside assistance. Other companies offer other products and services aside from RV roadside assistance. Coach-Net solely focuses on RV roadside assistance. It’s nice to know how dedicated the company is to providing a quality service to its customers.
- 24/7 Service. Not only does Coach-Net offer around the clock service, when you call with an issue, you’re also going to speak to someone who is factory-trained, RVIA/RVDA and/or ASE certified. This lets you know that when you call Coach-Net that you’re going to get someone who is competent and will help you with your issue.
- Campground Coverage. Not only are you protected while on the road but with Coach-Net they will also cover you if you are in a campground giving you extra peace of mind.
- Tow vehicle coverage. Coach-Net offers services for motorhomes and towables. In our case, we tow our fifth wheel with our truck. Coach-Net will help us out if our truck ever needs a tow which eliminates the need for a roadside assistance plan specific to our truck.
- Unlimited towing. If the truck or RV has an issue and needs a tow, Coach-Net offers unlimited towing. They don’t have mileage or dollar amount caps meaning they will take your RV or vehicle to the nearest garage, even if it’s 200km away.
- Emergency Trip Interruption. In the unfortunate situation where we were to get into a collision, Coach-Net will reimburse us up to $2000 for an automobile rental, food, and lodging.
- Caller Locator Technology. If we were travelling in an unknown area and blew a tire it would be hard to get help. Coach-Net uses the same caller locator technology that other emergency services use to help locate your whereabouts thus never leaving you stranded.
Our Experience With Coach-Net
The funny thing about an RV roadside assistance plan is you don’t want to use it because that means your trip was safe & smooth with no issues. We managed to travel 10,080km across Canada in 36 days with no issues. This meant that we didn’t have to use our Coach-Net plan and still haven’t needed to since arriving in Tofino. This is a great thing, of course, and we hope it stays this way. However, should we encounter an issue where we need to use Coach-Net, we’ll be sure to update you on how the service and experience was. We strongly believe that if an incident ever occurred that we would be in good hands with Coach-Net.
Put your mind at ease when travelling and get yourself a Coach-Net RV roadside assistance plan.
Do you have an RV roadside assistance plan? What’s your experience been like?
This post is sponsored by Coach-Net. We received a 1-year premium membership in exchange for this article. All views are 100% true and accurate of our feelings regarding Coach-Net and their products & service.
The post Why You Should Choose Coach-Net For RV Roadside Assistance appeared first on Full Time Canada.
]]>